Aniversario
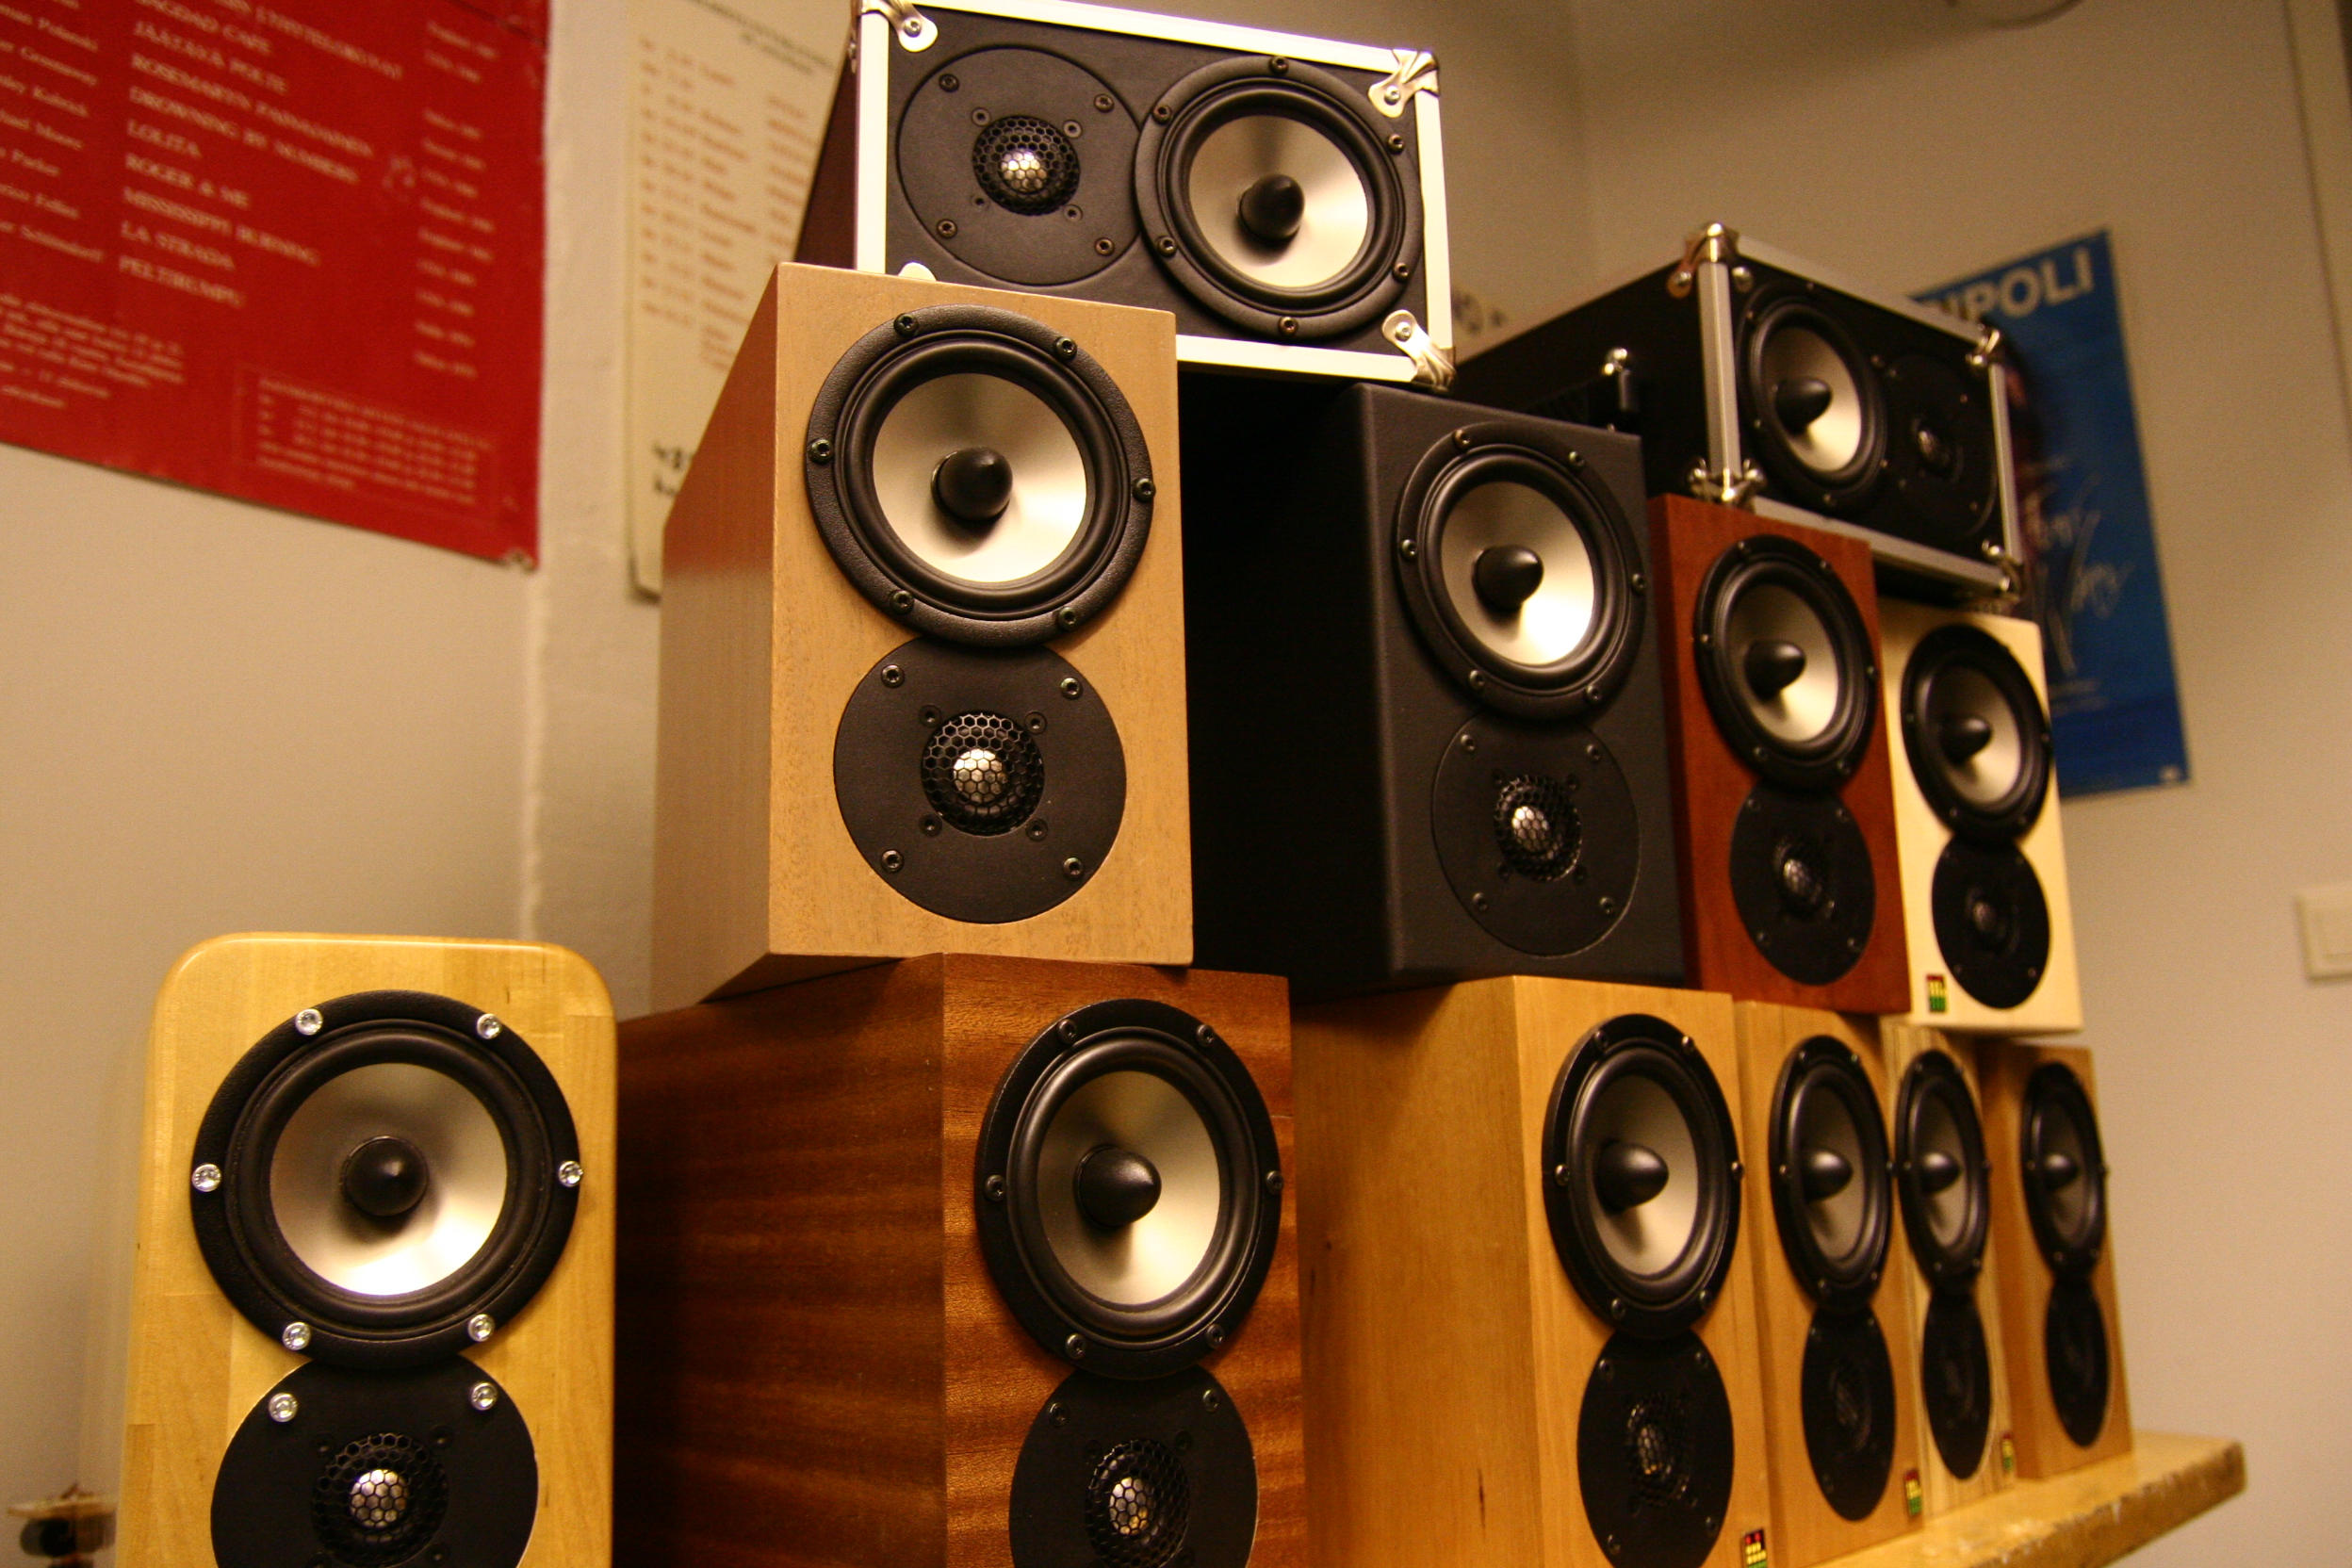
The Audiopoli Aniversario, or Anni, is Audiopoli's best-known speaker-building project: a small 4.7-litre two-way loudspeaker that members have built themselves in the association's workshops since 2007. It was designed as the project for Audiopoli's 10-year anniversary, in cooperation with Gradient, and the name comes from the anniversary (aniversario is Spanish for anniversary).
In the project Audiopoli arranged the drivers, lumber, tools and workspace, so builders could get straight to building the speakers with the help of experienced builders. In listening evenings the speaker was well received: the sound is precise and bigger than its size.
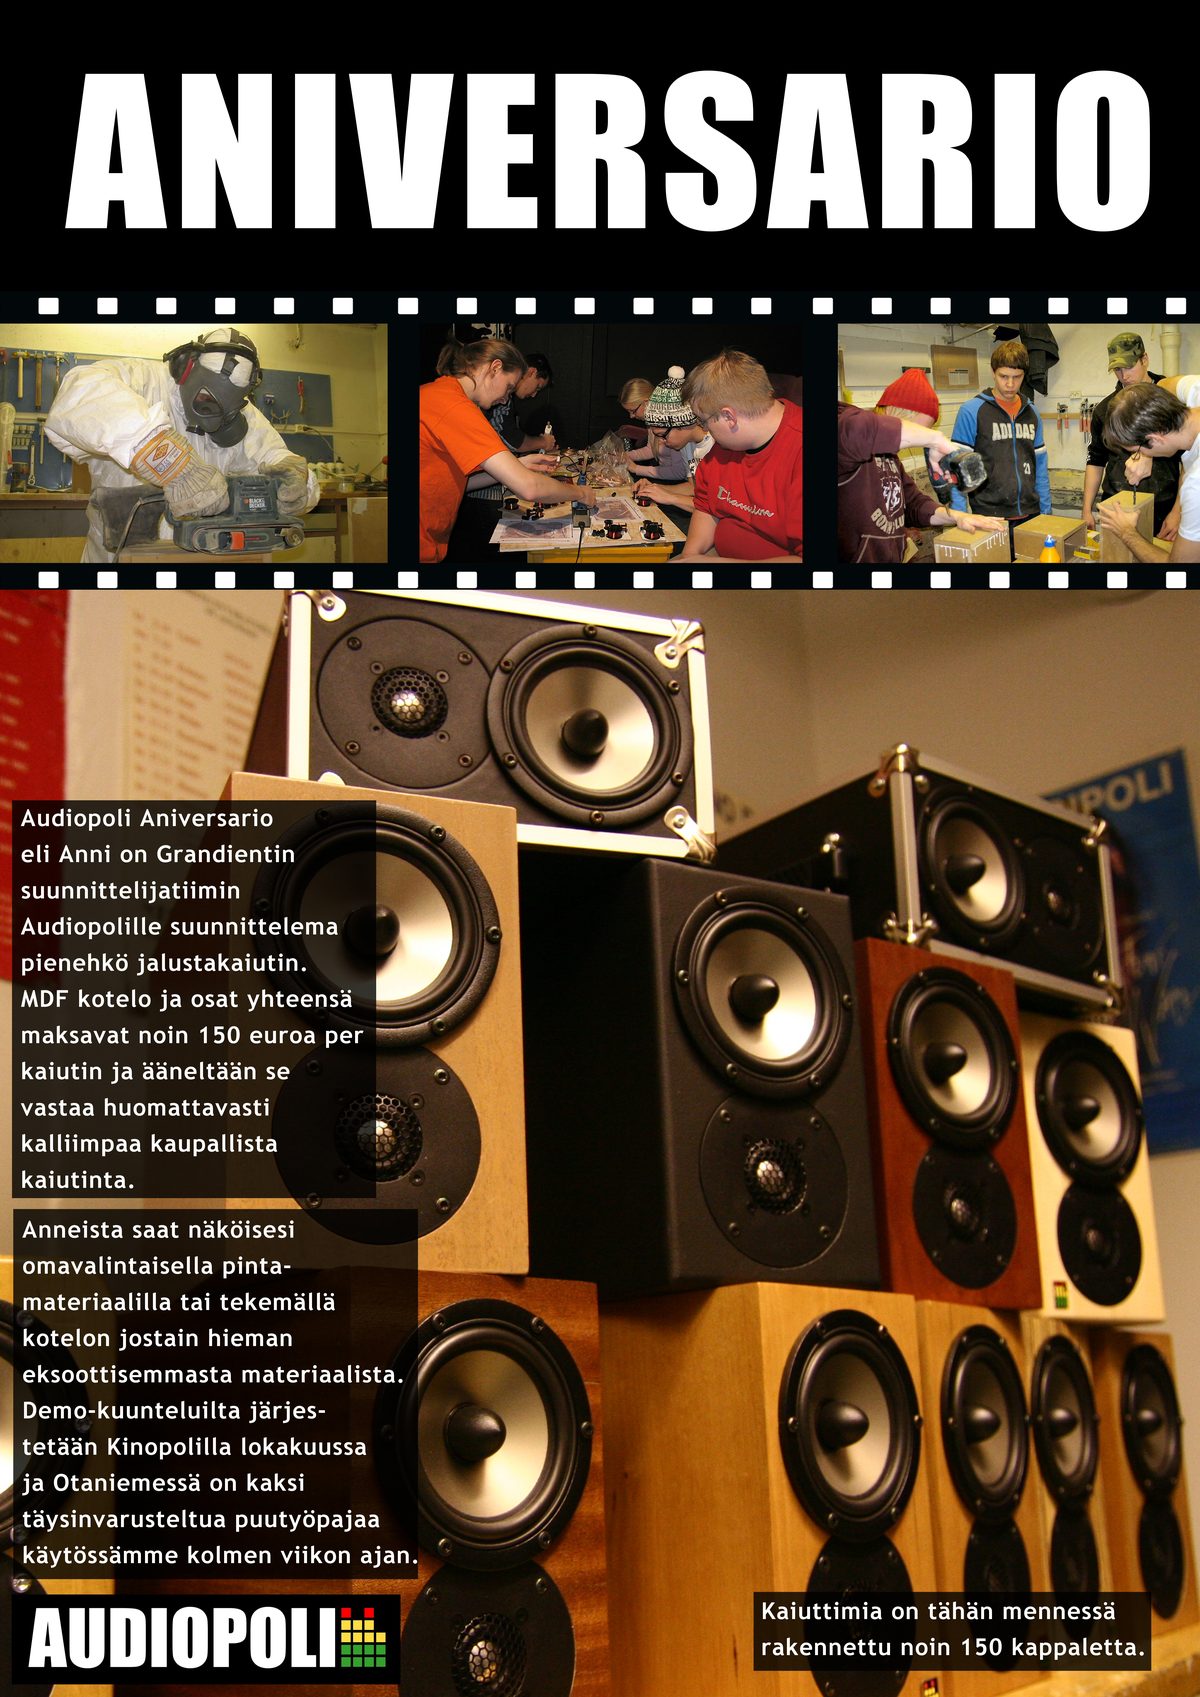
The project's recruitment poster, 2008 (in Finnish)
Specifications
- Two-way, bass reflex
- Enclosure: 19 mm MDF, external dimensions 140 × 230 × 280 mm (W × H × D), internal volume 4.7 litres
- Woofer: SEAS L12RCY/P
- Tweeter: SEAS 22TAF/G
- Passive crossover
- Price for builders: €148 per speaker in 2007. The price included everything except the surface finish.
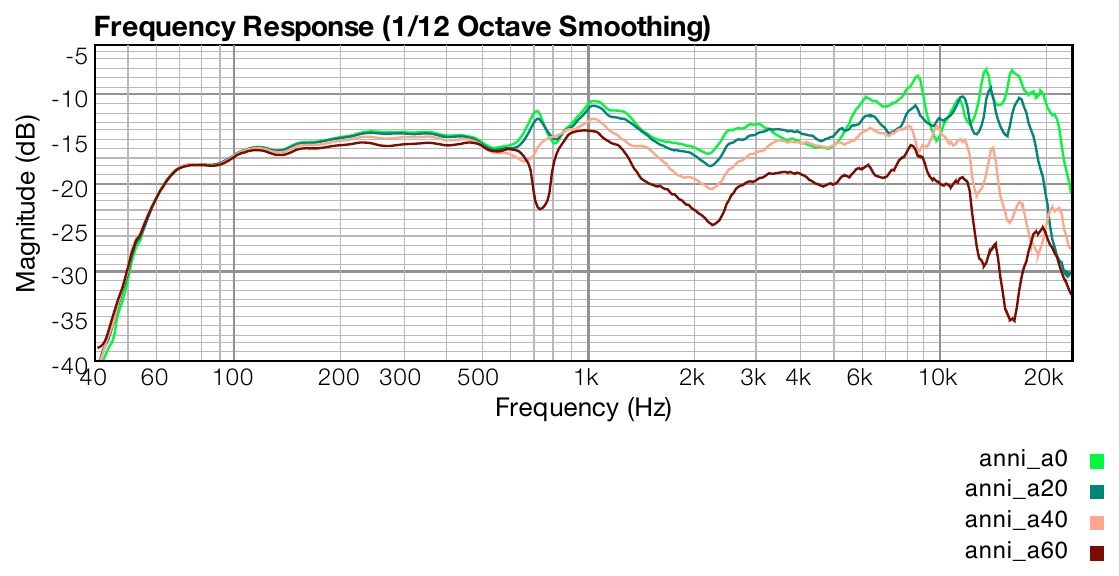
Measured frequency response on-axis and at 20, 40 and 60 degrees (1/12 octave smoothing)
Build rounds
Several hundred Annis have been built:
- 2007: the first round, 148 speakers. The workshops were booked for over three weeks, and almost everyone got their speakers playing within that time.
- 2008: over 200 speakers, the record for an Audiopoli speaker project.
- 2009: about 80 speakers.
- 2012: about 140 speakers, plus 21 aluminium-cased Annis as a more demanding special project.
- 2020: a new round, 180 speakers. Improved versions of the Anni were also tried out at the same time, see Anni prototypes 2020.
Bass stands were also designed for the Anni, see Anni bass stands.
Building guide
Below is a summary of the Anni enclosure building guide. The illustrated original guide can be downloaded as a PDF: Anni enclosure assembly guide (PDF, in Finnish).
Assembling the enclosure
For each enclosure you need six panels (of three different sizes), plus a drill with a 2 mm bit, a screwdriver, wood glue, screws, a countersink tool for screw heads, a belt sander, an orbital sander, filler and a putty knife.
- Place one side panel and one top or bottom panel (the largest and the smallest panel) together to form an L, so that the side panel covers the end of the top or bottom panel. Assembly goes best in pairs: one person holds the pieces in place.
- Drill 2–3 pilot holes through the side panel into the middle of the top or bottom panel. Don't drill close to the corners, or the board may split. Mark the orientation of the panels so the holes line up again when you reassemble.
- Countersink the screw heads in the side panel.
- Drive the screws into the side panel's holes so that the tip protrudes 1–2 mm through the board. The tips guide the panels into the right position while gluing.
- Apply glue to the end of the top or bottom panel: a strip 2–3 mm wide is about right, with a little more in the corners.
- Put the panels together and drive the screws in until the heads sit 2–5 mm below the surface. Wipe off excess glue. The screws can be removed after the glue has dried if needed.
- Make the second L-piece the same way.
- Join the L-pieces into an O. At the second joint you may need to twist the panels slightly so the edges line up.
- Attach the front and back panels with 4–8 screws. The port hole in the back panel should line up with the tweeter (smaller) hole in the front panel, because the port tube doesn't fit behind the woofer. Don't put a screw at the middle of the front panel's end: the tweeter's recess reaches close to the edge.
- Repeat for each enclosure.
- Sand off the bumps with the belt sander. Take care not to round the corners.
- Fill screw holes and gaps with two-component filler and sand the surface flat with the orbital sander. Mix in about 2 % hardener, and only make as much as you can spread in about five minutes. The filler is ready for sanding after 10–20 minutes. Two rounds is usually enough, but the flatness you need depends on the finish: thick fabric hides almost every dent, veneer only hides small sharp dents, and a thin glossy paint finish needs an almost perfectly flat base.
Veneering
This guide is written for the iron-on technique and PVAc glue.
- Getting veneer: the veneer should be wide enough that it doesn't need to be joined. For the Anni the required width is 28 cm plus allowance (about a centimetre on each side). Long-grained wood species split easily when ironed: birch, beech, alder and especially ash are the most sensitive. Calculate the amount as the total length of the pieces, not in square metres, and allow plenty of margin. Veneer is usually sold in sheets about 3 metres long.
- Cutting: cut the veneer on a flat surface with a utility knife against a ruler, with several light strokes. Leave at least 5–10 cm of allowance at the ends.
- Gluing: spread the glue carefully with a foam roller, especially at the edges. Sawn panel ends soak up more glue. A translucent white layer is enough on the enclosure, less on the veneer, because too much glue stops the stain from soaking in evenly. If the veneer curls, spray a little water on the opposite side.
- Drying: the glue is left to dry on the surface for about 10–15 minutes, until it feels hardened and the white colour has disappeared.
- Ironing: place the veneer in position and iron from the middle towards the edges, pressing firmly. Don't heat the veneer too much at once, or it will split. You can check adhesion by rubbing with a finger: loose veneer "rustles" more.
- Trimming: remove the excess veneer with a flush trim router, with the speaker between you and the router. Don't tilt or press the router too hard. Finish the edges by sanding them flush with the enclosure. Do the front panel last.
- Holes: make the driver and port holes only after veneering, using a drill press and a hole saw, and drill through the veneer carefully. The port hole goes roughly behind the tweeter. The tweeter also needs a recess and cutouts for the connectors.
- Final sanding and finish: for waxed speakers grit 240 is enough, for lacquered ones at least 320 (finer is better). Don't sand through the 0.6 mm veneer. Apply several coats of lacquer with sanding in between, or wax twice.
Finishing and assembly
- Port tube: attach with hot glue, and use plenty so the seam between the tube and the enclosure also gets sealed.
- Stuffing: fill the enclosure loosely with wadding (about 130–150 g), but keep the wadding away from the mouth of the port tube. Rule of thumb: with the woofer removed, you should be able to reach your fingers into the port tube without touching the wadding.
- Drivers: the crossover wires can be soldered directly to the driver terminals, but quick-connect terminals make it easier. Drill pilot holes for the mounting screws so the MDF doesn't split.
- Audiopoli badge: an Audiopoli pin can be attached to the side of the Anni. Grind off the pin's spike and glue the badge to the enclosure, or drill a small hole in the side of the enclosure for the spike.